Build a rock wall
The following is recommended as a guideline only and may not be applicable in all situations. For more information try the local library, the Internet or consult a professional.
1. Dig and fill the trench
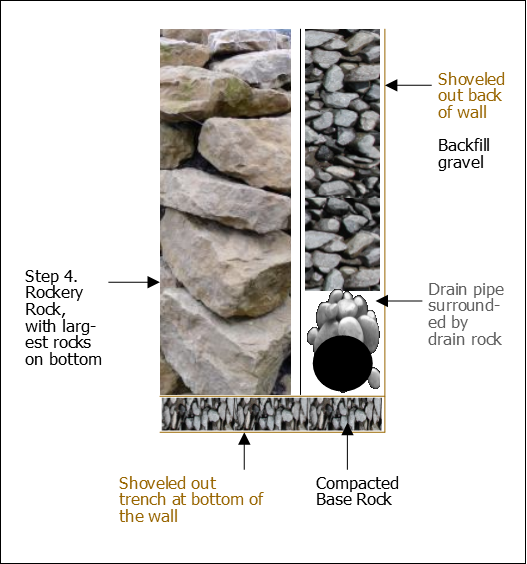
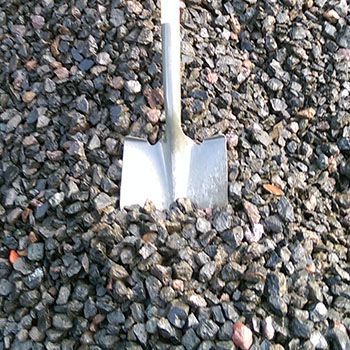
Dig out the bottom of the wall to create a smooth and level trench. The trench width needs to allow for 6-12" of backfill rock as well as the wall-rock width. Fill the bottom with 3" of 5/8" Minus Crushed Aggregate. Rake, compact and level the gravel.
2. Laying your first layer
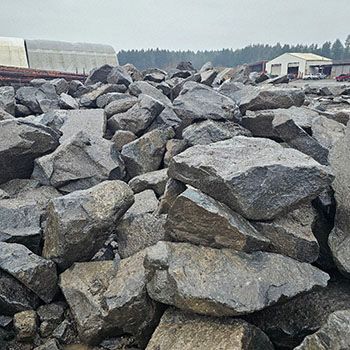
The most common way to build the wall is to keep all of the flattest faces of the rock facing outwards to maintain a clean and uniform look. You want to put the largest stones on the bottom layer to ensure a strong and secure base. Pull the rocks up against the front of your trench as you set them in place.
3. Backfill
Lay your drain pipe and surround it with 1 1/2" Utility Drainrock. Then continue to fill up to the top of your first layer of rock that you just laid in with backfill rock. The most commonly used backfill rock is 1 1/2" - 3/4" or 3/4" Clean Crushed Black. See the diagram below.
4. Continuing the Wall
Continue adding layers of rock to the wall, adding backfill behind it as you go. The rocks should get progressively smaller as you build higher. The wall should lean back slightly as you build so that it will have the strength to stand up against the weight of the backfilled dirt, particularly when wet and heavy. Keep building until you get to the top.
5. Finishing the Wall
If preferred, you may stop filling with backfill rock when you are near the top and instead fill with garden or lawn soil so that you can plant flowers or grass at the top of your wall. To give your wall a nice finished look, it is nice to save any thin flat rocks you may find as you are building for the top 'cap' stones.